
Hello everyone in this lesson we will learn about Gulp. We have three goals with this lesson.
- Number one we will learn what is gulp.
- Number two I will help you install gulp.
- And number three we will have a hands on demo.
We will write a bit of code together and you and I can see gulp in action. So let’s get started with number 1.
What is gulp. Gulp is what we call a build system or a build tool. And this just means that golpe makes it easy for us to automate development tasks. Gulp is actually at the heart of all automation that we will be setting up in this course.
Now Gulp by itself doesn’t actually do anything. And that’s the beauty of it. Gulp is super lightweight super efficient and runs incredibly quickly on our computers. You can think of gulp as a record player. So by itself without a record record player can’t really do anything; it can’t play music. So if gulp is our record player, gulp plugins are the records. There are thousands and thousands of gulp plugins that we can choose from to automate almost any development task that we can think of and there are new plugins being created every day by the community.
Now the good news is that gulp is super simple. There’s not a whole lot else to say about it right now which means we are free to move on and actually begin using it and the first step is to install gulp.
There are two steps to installing Gulp. The first is to install it globally and the second step is to install it within the project that you are working on.
We will go over both of these in detail. Let’s start with step 1, installing gulp globally. So what does that mean.What does it mean to install something globally.
Well if you go to your command line right now and type Gulp and then hit Enter your command line will probably reply with something like. Command not found or unknown command.
Once we install gulp globally on your computer then your command line will know what gulp is and then we can run gulp commands.
We can actually go ahead and install golpe globally directly from our command line. We can use NPM so type this command in :
npm install gulp-cli –global
go ahead and hit enter.
All right so what did we just do. Well in our last lesson when we used NPM install and then the name of the package node would go out onto the Internet and download package files into our node modules folder within a particular project that we were working on.
However since this time we used the global flag the –global node installed these gulp package files into a more universal or global place on our computers harddrive.
We can point our command line to any folder on our computer and we will always have global access to gulp commands. So for example try just running gulp again. So gulp and hit enter. This is actually a gulp error message but it’s a good sign that we see it. That means that we have gulp installed.
You can also try
gulp -v
as long as you see a live version and then a few numbers you’re in business you’re good to go. If when you run gulp or gulp -v you are still seeing command not found or unknown command. That just means you need to troubleshoot your gulp install a bit if you are on a Mac. The first thing I recommend you do is to rerun the install command we ran just a moment ago but this time preface it with sudo.
sudo npm install gulp-cli –global
I will include a few other common troubleshooting solutions in the discussion for this lesson. But for now let’s move on to the second step of installing golpe which is adding it to the specific project that we are working on which in this case is the fictional travel agency Web site. So the first step is to point our command line towards that directory.
So I’m just going to type CD space and then find the travel agency Web site folder here it is and drag it onto the command line. All right.
So we want to install gulp within this project which means we want to add the gulp package into the projects package.json file. So to do that in the command line we just type
npm install gulp –save-dev
You will notice that that is a little bit different than how we saved packages in our previous lesson and that lesson we just used dash dash save but this time I want you to do dash dash save dash dash.
I will explain why in just a moment. But go ahead and press enter.
That might take a moment to complete but when it does go ahead and open up the project’s package digests on file in your text editor when you do that you will notice a new area named Dev dependencies.
So in our previous lesson when we installed packages with dash dash save they were added to the dependencies area. These are packages that our Web site needs to actually run in the web browser just a moment ago when we installed gulp using –save-dev. We saved it to this other area designated for packages that make our life as a developer easier.
If the distinction between these two different types of dependencies isn’t crystal clear right now that’s ok. Don’t worry about it.
I think it will become clearer over time as we work our way through the course and continue to install more and more packages for the time being. Let’s pat ourselves on the back because we have just installed gulp to prove it. Go over to your command line and simply type gulp and hit enter.
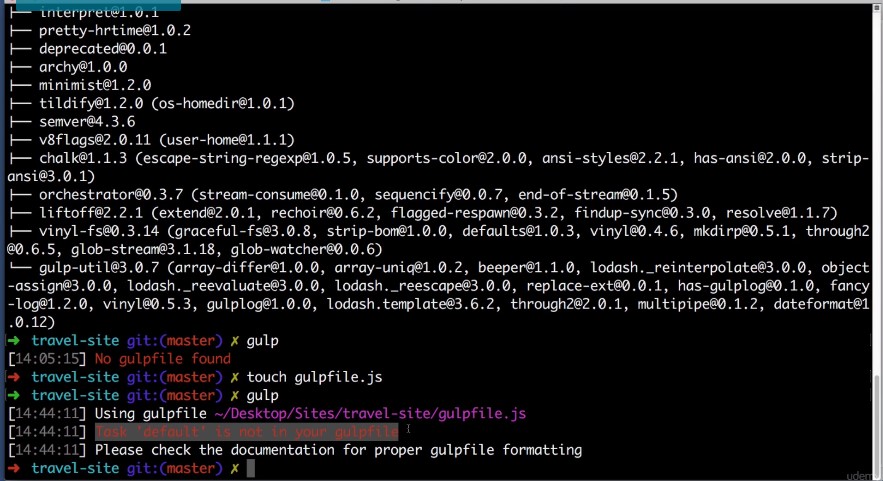
You should see an error message that says no gulp file found. Excellent. This confirms that we have installed gulp both globally and in our project and we can now move on to the fun part of the lesson where you and I write a bit of code together to make gulp actually do something.
All right. The first thing we want to do is to create a brand new completely empty javascript file and within that file we can tell gulp what to do. Gulp is expecting us to create this brand new file in the root directory of our project and it expects us to name this file gulpfile.js.
So you can use your text editor to create a new file or in the command line you can just type touch and then gulpfile.js
touch gulpfile.js
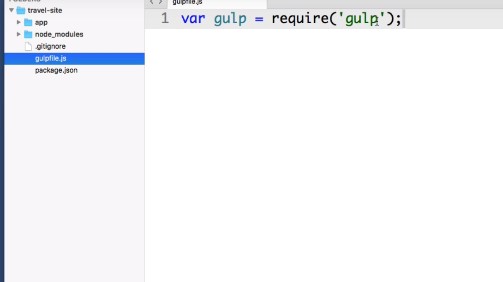
Let me open that file in my text editor. Before we write any code the first thing we want to do is import or require the gulp package that we installed just a moment ago.
So for example within the node modules folder for our project we just installed this golpe folder just a moment ago. So we want to import the gulp library code into our little file so we have all of that functionality at our disposal.
So we do that by typing var. We just want to create a variable. We could actually name this variable anything we like but let’s name it gulp. Just to stay sane.
So var gulp equals and we just want to import or require in the gulp package.
var gulp = require(‘gulp’);
Go ahead and save this file and then let’s try to run the gulp command in our command line again. And we should see an error message that says task default is not in your gulp file
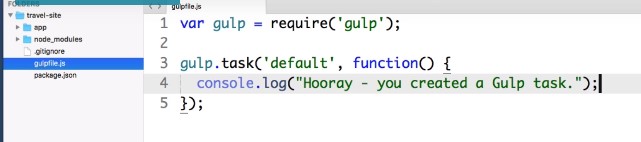
So everything in gulp revolves around tasks when we run the gulp command in our command line, Gulp is expecting us to have defined a default task in this very file. So let’s do that right now.
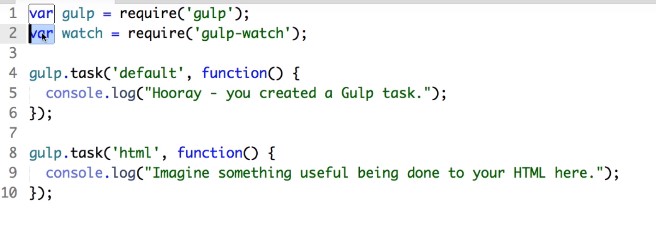
So we will begin with the variable that we created earlier the imports in the gulp Library. It contains a method named task which lets us create a new task. We are going to pass it to arguments: The first is what we want the task to be named. So in this case we are creating the default task and the second argument is simply what we want to happen when this task runs. So let’s just create an anonymous function and all we want to do is log out to the console a bit of text that says hooray You created a gulp task. OK. Go ahead and save this.
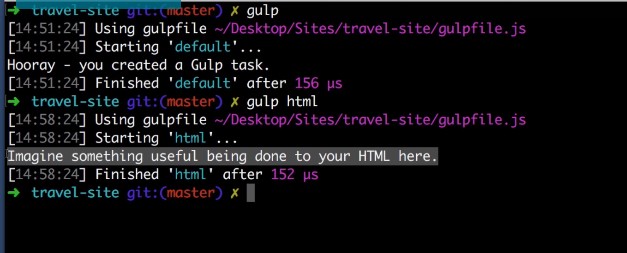
And back in the command line. Now if we run gulp we see that gulp runs our default task.

Now granted in real life you will probably do something more useful than just logging a bit of text to the command line but you get the idea. It’s very unlikely that you would only have one gulp task. So let’s practice creating another task. So gulp we want the task method to create a new task.
Let’s create a task named HTML create an anonymous function for it to run and let’s just log out a bit of text that says imagine something useful being done to your HTML here. Go ahead and save this.
Now to run the default gulp task you just type gulp. But we can also run specific tasks by typing gulp space and then the name of the task. So we just created a task named HTML which is go ahead and run it and there it is.
Right now I have to imagine that ninety nine point nine percent of people watching this are scratching their head thinking why is this useful. Why would anyone use gulp.
Well remember earlier when we said that gulp by itself can’t really do anything. We need to add gulp plugins in order to do anything actually interesting.
So right now I want to introduce you to your first gulp plugin its name is gulp watch and it’s the plugin that makes automation possible. This plug in can watch specific files on our computer. And when it detects that we saved changes to a file it can trigger a gulp task in response.
It’s much easier to just see it in action than trying to describe it with words. So let’s set it up right now. The first thing we want to do is install this plugin and add it to our package.json file.
So to do that we just type in our command line and then install the name of the package is gulp watch and then be sure to include dash dash save dev.
npm install gulp-watch –save-dev
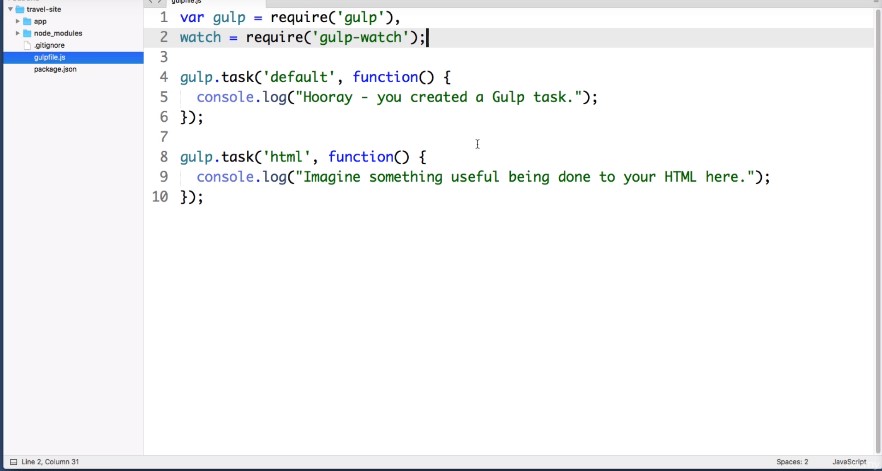
once that completes Let’s go ahead and import it at the top of our gulp file. So we will create another variable name watch and we just want to require in the gulp watch package. Here’s a quick tip: when you were creating multiple variables in a row you don’t actually need to spell out var each time. You can actually just get rid of this and then change this line to a comma. And that saves us a bit of typing.
All right.
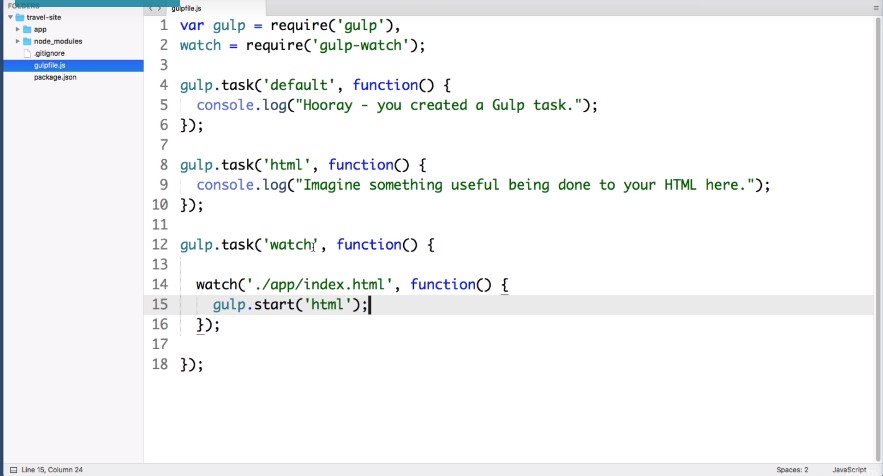
Now let’s come down to the bottom of the file and let’s create a new task and name it Gulp Watch. And then let’s create an anonymous function. So this task actually does something when we call it from the command line. So here is where we leverage the gulpwatch plug in.
Let’s type watch so we can use the variable that we just created and we can pass this function to arguments. The first is the file on our computer that we want to watch for saved changes too. So in this example let’s go ahead into our app folder and let’s watch this main index.html for changes so we can type Daut forward slash to go to the root of our project and then we will drill into that app folder and then watch the index that HTML file.
The second argument that this watch function takes is what we want it to actually do. So we will create an anonymous function. So whenever we save a change to this HTML file what’s automatically trigger our HTML task to do that we just type gulp start and then the name of the task we want to start.So each team go ahead and save that.
Now let’s go to the command line and take this watch task for a spin. gulp watch
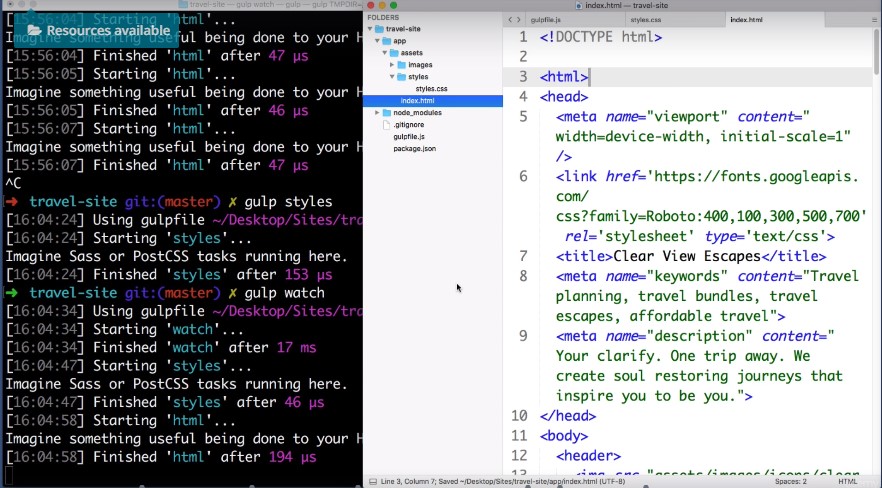
OK. So a gulp watch task doesn’t end until we tell it to end. So right now it’s running silently in the background just waiting for us to make some saved changes. So for example in our text editor Let’s open up our main index.html file that it’s watching.
Let me shrink my text editor window so you can see the command line in the background. And let’s just make a trivial change to this file maybe add a space after this line and hit save. And we saw that in the background in the command line.
As soon as we hit save on that file our HTML task was automatically triggered by gulp. And if we go back to our text ditor and save again and again and again you see that each time instantly gulp reruns that task we can tell go up to stop watching by in the command line pressing control-C.
Now the best part about the gulp watch plugin is that we can have that watch different files and trigger different tasks depending on which file was saved.
So we already set up an example HTML task. Let’s set up an example CSS task. So in our projects folder Let’s go into the app folder and then into the assets folder and let’s create a new folder named styles and in our text editor let’s create a dummy CSS file for gulp to watch.
So in that styles folder let’s just create a new file. We can even just leave the file blank for now. And let’s name the file styles.css
Alright. So back in our gulp file within this watch task let’s create another watch area. So watch let’s configure this so that if any CSS file within this Styles folder is changed we trigger a certain task.
So we will go to the root of our project and then go into the app folder and then the assets folder the styles folder and then we even want to go into any future hypothetical folders. So Star Star and we want to watch any file that has a CSS extension and then let’s tell gulp watch what to do if one of those files does change.
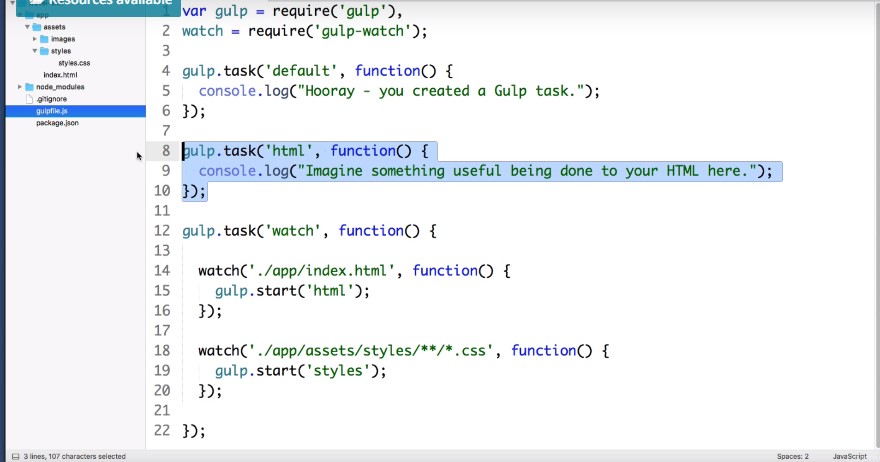
So it’s create an anonymous function and we just want to trigger a new gulp tasks. Let’s say gulp start. Now we haven’t created this task yet but let’s say styles and then really quickly up here. Let’s just copy this HTML task paste it and just change this to styles.
And in this area where we log out some dummy text. Let’s just say “imagine SAS or postCSS tasks running here.”
Go ahead and save this file. Now back in the command line if we type gulp styles we see that task that we just created.
But more importantly if we run gulp watch again and let me shrink my text editor so we can see the command line in the background.
If we make a change to this dummy css file we see that the styles task is ran in the background. And if we make a change to our HTML file we see that gulp runs the HTML task.
Excellent.
Let’s go ahead and push control-C to tell gulp to stop watching.
And from here I think you can use your imagination a bit to picture a not so distant future where we make something actually useful happen here. And here instead of just logging out dummy text and that is exactly what we are going to be doing in the next lesson, in our next lesson. We will get our CSS architecture up and running in this course.
We are going to use postCSS for everything instead of something like SASS or LESS or STYLUS. We are going to install all of the gulp postCSS plugins and set up automation so that whenever we save one of our CSS files the post CSS is automatically compiled into regular CSS.
It’s going to be a lot of fun and I will see you in the next lesson.
Code:
var gulp = require(‘gulp’)
watch = require(‘gulp-watch’);
gulp.task(‘default’, function(){
console.log(“Hooray – you created a Gulp task.”);
});
gulp.task(‘html’, function() {
console.log(“Imagine Something useful being done to your HTML here.”);
});
gulp.task(‘styles’, function() {
console.log(“Imagine Sass or PostCSS tasks running here.”);
});
gulp.task(‘watch’, function() {
watch(‘./app/index.html’,function(){
gulp.start(‘html’);
});
watch(‘./app/assets/styles/**/*.css’,function(){
gulp.start(‘styles’);
});
});
