What is Git?
Git is a tool we install on our computer.
Git helps us manage our project’s files, could be anything, HTML, CSS, JS, Images, etc.
HISTORY
Git Tracks History: Git keeps track of every change we make to our project. Git can tell us on which date and which file and show which line we add and remove.
If you need to revert changes you can if you want to look back and see how a file has evolved over the past year, you can. Nothing is ever lost or nothing is ever final, thanks to GIT’s history.
COLLABORATION
If you’ve ever tried to create something on the computer with a group of people or a team of people, you know that a common concern is trying to avoid accidentally deleting or overwriting each other’s progress.
GIT makes collaboration very easy and it allows you to be more productive when working in a team. You don’t need to sit around waiting for someone else to make their changes , you can continue working on your changes and rest assured that when it comes time to sort of merge everyone’s changes together so that everyone has the most updated copy of the files get has got your back.
Git will take care of merging any conflicts, Git we’ll save the day.
FEATURE BRANCHES
What is a branch? Well the best way to explain that is to look at an example. So let’s imagine that we have an existing web site that we are responsible for editing and updating and making improvements too. And let’s imagine that we were just assigned to tasks.
Number one we need to redesign the header of the Web site maybe add a new logo change the slogan change the colors and task number two we need to adjust the styling and ordering of the links in the footer.
OK so how would things play out if we were not using GIT. It would probably look something like this.
Day one we get started on both tasks but we don’t complete either task so we can’t go live with our changes.
Day 2 rolls around and we continue working on both tasks.
By the end of the day we actually finish the footer changes.
But our Header is nowhere near complete.
So now we are in this weird position where we wish we could go live with the updated footer but we can’t because our code is all lumped together and if we uploaded the files to the live Web site right now. The footer would look great but the header would look broken and we might not finish the header for another week.
And you never want one piece of your code holding another piece of your code hostage. So clearly this is not the most productive or efficient workflow.
Now instead let’s look at the good way of doing things the way of implementing multiple tasks or features.
All right if we were using get and we were just assigned the header and footer tasks Here’s how it would look.
Let’s think of our project as a tree. We want to create two new branches one for each task. So we create one branch and name it. Header changes and we would create another new branch and name it. Footer changes when we feel like working on the header. We check out the header changes branch when we make any changes related to the footer we check out the footer changes branch we can hop back and forth between these two branches or between these two versions of our project throughout the day get tracks the branches separately from one another.
So it is not a big deal if we finish one feature first. So let’s say we finished the footer changes and we are ready to go live with them.All we do is we take that branch that put her changes branch and we just fold it back up into our treeor we merge it into the tree maybe a week later or even a month later we finish the header redesign whenever that time comes.

So whether you want to become more attractive to employers or you want to fly solo but bring a bit of structure and organization to your code learning good is truly a must. Which brings us to where do we begin.
GIT Vocabulary:
Explains some of the vocabulary meaning of terms in GIT World.
Repository / Repo = Project
Working Directory = Folder Location on your computer
Staging = Selecting Preparing before committing
Commit = Git’s way of saving. Nothing is saved in Git’s database until we make a commit.
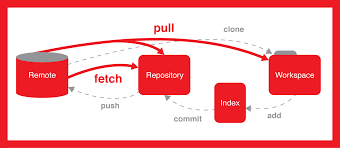
Push & Pull
All is done through command line
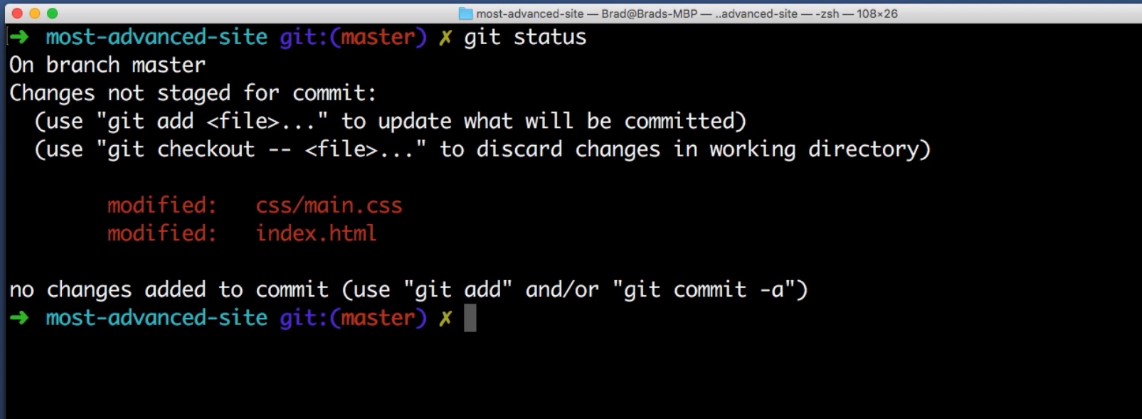
git status
Git let me know that these are the two files that have been modified.
OK so I know that I want to stage both of those files. So instead of having to pick which files I want to stage I can just say I want to add to the staging area :
git add -A
This will add all changes to the staging area. So now if I run git status again get tells us that.
OK here are your changes that are ready to be committed. These are the files that I had in mind so this staging area looks good to me. I’m ready to commit it. So I just typed git commit and it’s always a good idea to include a message with your commit.
So I’ll type git commit -m in a bit of a quote and I will say I “made the header orange and removed a line of text.”
And we’ve successfully committed those changes in to Git’s history.
The reason this is so nice is now even if in the middle of the night our cat sneaks onto our laptop and deletes all of our code and says ha ha ha Cats rule! and they erase our CSS file and just say purring and sitting in the sun.
OK and we refresh and our hard work is gone.
All we need to do is come into our command line and type.
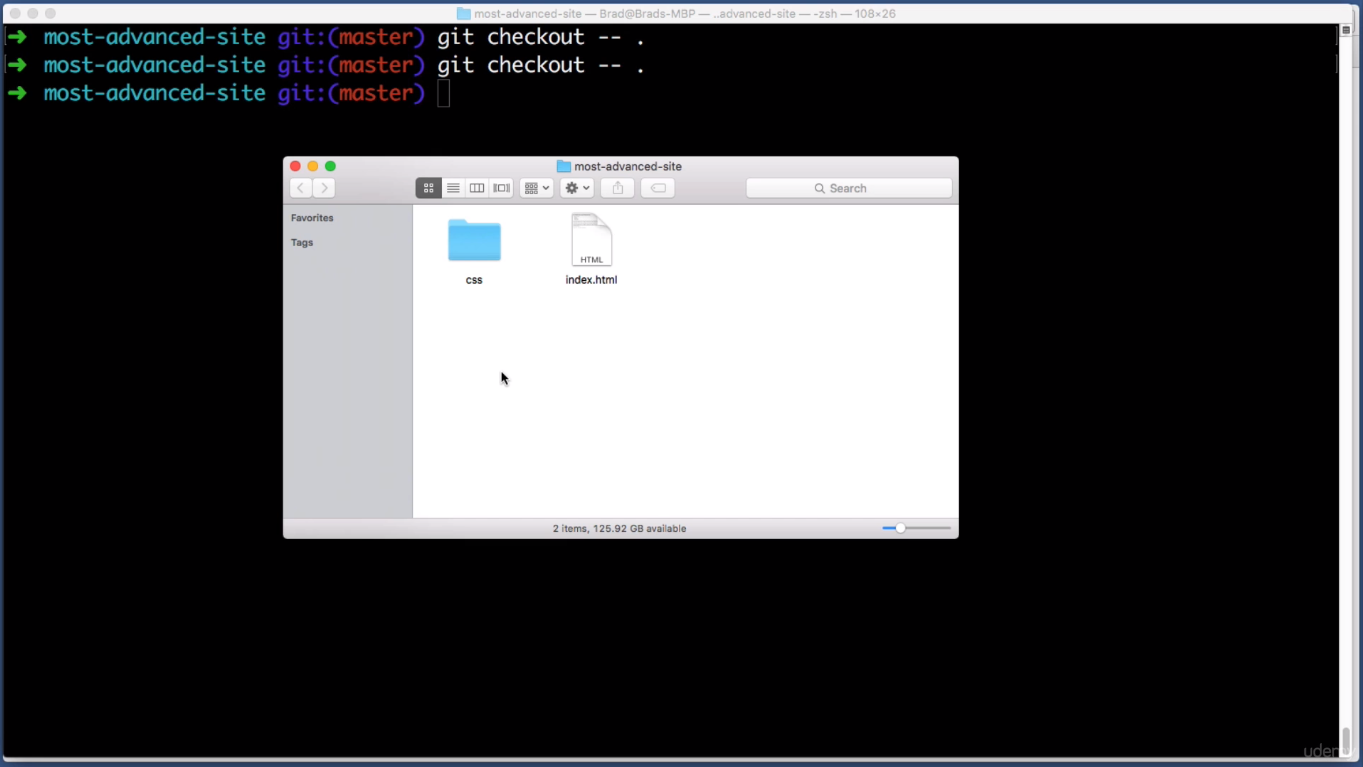
git checkout –.
our files are right back to the state that they were in when we made our last commit. And even if your cat is especially evil and delete your files outright in the middle of night moves them to the trash and your cat is even intelligent enough to empty your trash and even close out your text editor.
Git has still got us covered.
So we just go over to the command line.
git checkout –.
The files are restored.
OK so now we know that the files in our repository are cat proof but are they disaster proof meaning if we accidentally throw our laptop into a pool of water or off the side of a cliff would we be able to still access the files.
Let’s answer that question right now.
In the final section of this lesson titled
push and pull.
OK so Git stores all of its history data in a hidden folder in the root of your git repository. So for example in the project that we’ve been working on this lesson in this most advanced site folder Git actually has a hidden system folder that we can’t see right now. And in that folder it stores all of the commits all of the changes all of the history for our repo.
Git stores all of this locally, meaning, on your computer’s hard drive. Now if all of this data is only on your hard drive that means a few things.:
- Number one: if your computer blows up your repository is completely lost.
- And number two: collaborating with a team of others is going to be pretty difficult considering only you have access to your computer.
Now we can solve both of these issues by hosting our get repository on a server somewhere. This is exactly what the popular service name to Git Hub offers. There’s a good chance you’ve heard of git her before and really quickly I want to point out that Git does not equal Github.
It’s just one of many many many services that can host your repositories. Github just happens to be the most popular service and it’s also the one that we will be using throughout this course.
Let’s take our first Super quick look at Github right now.
So in a web browser I’m just going to go to github.com and then from there visit the particular repository or project that I want to work on.
So here is the super advanced web site. You’ll remember that name from the one we were working on earlier.So here’s the good of overview page for this repository you can see here are the files here in the index.html file that we edited earlier,we can even preview the code in the browser.
But if we go back to the overview page and click on commits, you can see here are all of the commits in this project’s history and you will notice that the commit we made earlier in this lesson where we made the text orange and removed a line that’s not showing up here in this list of commits. And that’s because we committed that to our local copy of the repository.
But now we need to take what’s on our computers hard drive.We need to take that get repository and push it up to the server.
So I will jump back over to my command line and I’ll just type
git push origin master
again don’t worry about what I’m typing we will learn about this in the next lesson. But for now I typed that in
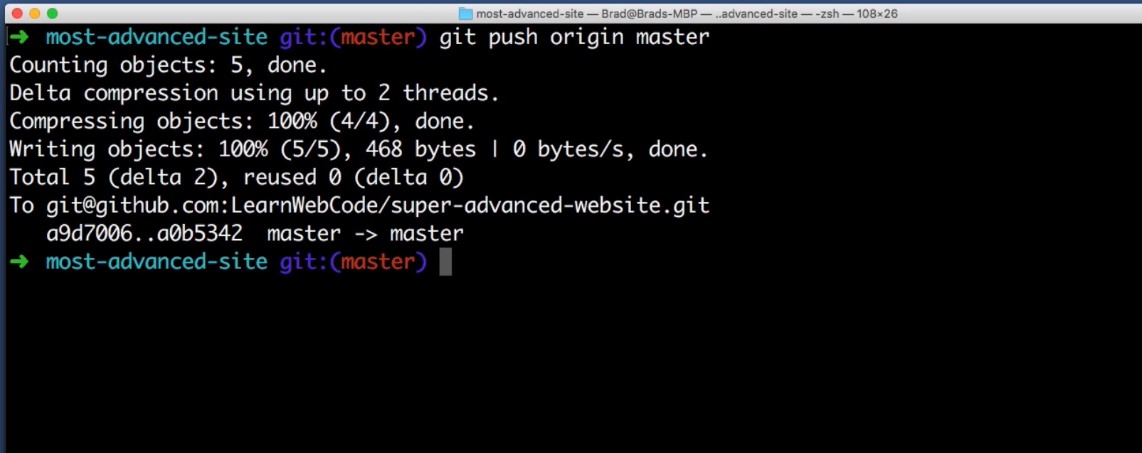
and if we go back to github and refresh this page we see here is the commit that we worked on earlier and if I click it we can see the details, github even tells us you change two files and if we scroll down it even highlights in green the lines of code that we added and it highlights in red the line of code that we removed.
Now the only thing that I want you to absolutely remember from the last minute is that what we just did is called a push. We took the repository that was on our hard drive and we pushed it up to the server.
So now the server is up today and has our latest changes.
OK so that’s a push.
What is a pull.
Well let’s imagine that we go on vacation for a week and while we’re gone our coworker makes a few updates to the Web site’s code.
So a week later we get back from our vacation we go to get Herb we click on commits and we see that there are two new comments from our coworker named John Doe we can click on each commit and see what he did.
So in this commit he changed the heading to be about dogs and he changed all of the bullet points to be about dogs. And in this other commit it looks like he just swapped out a few new colors.
Now imagine that our boss asks us to remove the line of text about being very loyal.
Well the files on our computer for the web site don’t even contain the word loyal because while we were on vacation our files don’t automagically get updated from the server.
So what we need to do is pull in the latest changes from the server into our local repository so that we are working with the most updated files.
So we head to the command line and I’m going to pull the keyword here is pull. Don’t worry about any of the other syntax for now but I’m just pulling in the latest changes from the server.
git pull origin master

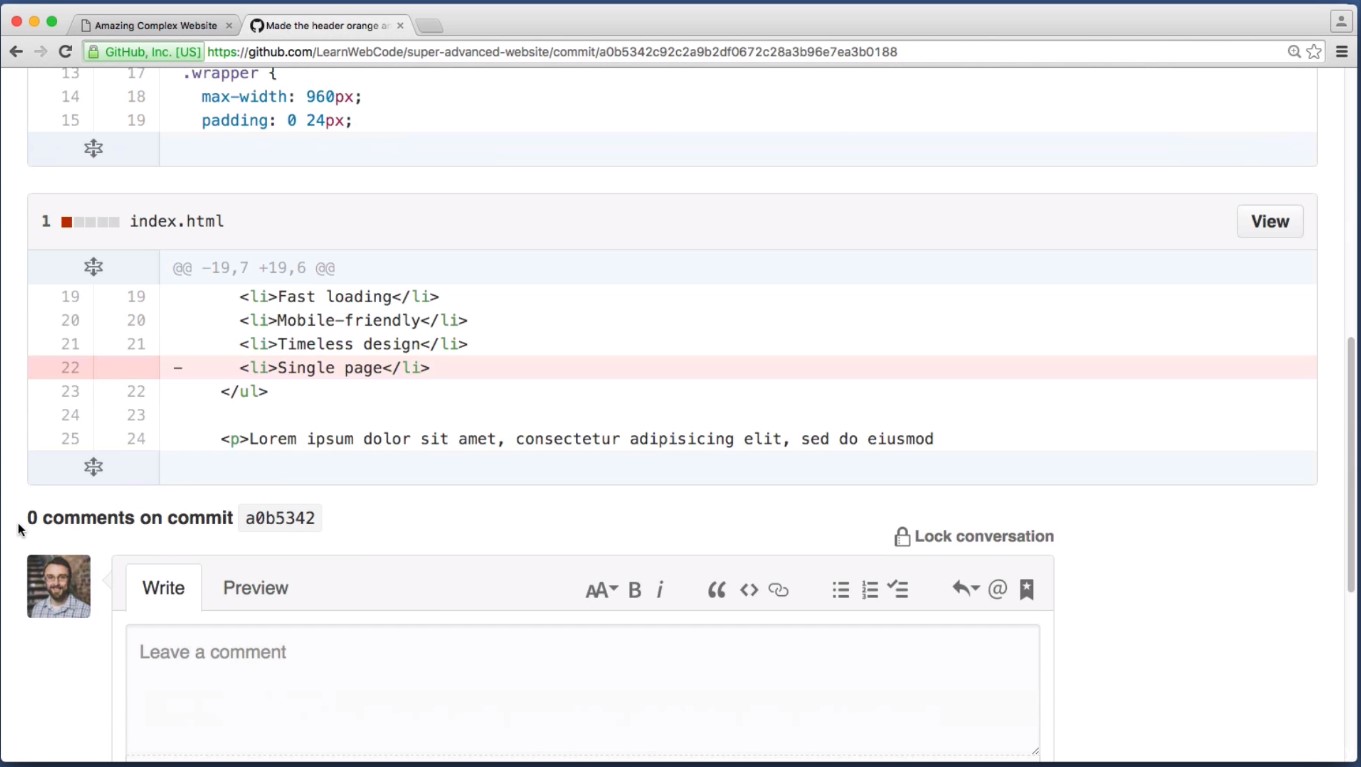
We can see that the pull was successful. So if I go back to my web browser of my local copy of the site and I refresh we see the color changes that our coworker made and we also see this line of text that says is very loyal.
So our boss wants us to remove that. So in our text editor he’s going to delete that line, save it,
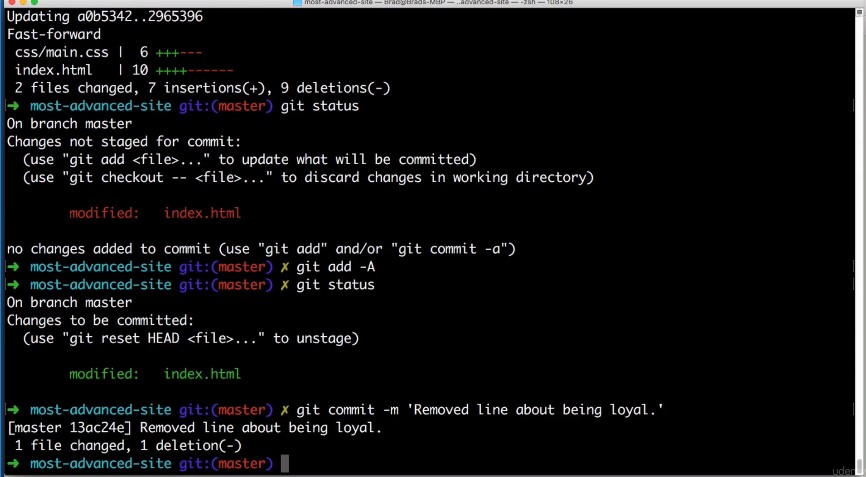
That looks good. So now I want to stage that change. So let’s do a git status. Yep that’s the only file that I want to add. I’m going to add it to the staging area.
That looks good.
We want to commit that get commit our message will be remove line about being loyal and then now that that’s committed.
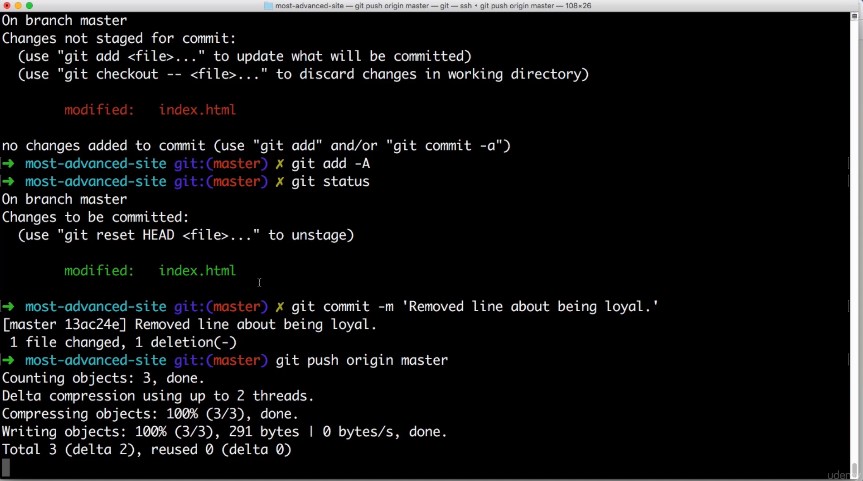
Remember we want to push that to the server.
So get push or master we will review the syntax in the next lesson so don’t worry about that but we’re pushing it.
K now if we go back to get click on commits Here’s the change that we just made.
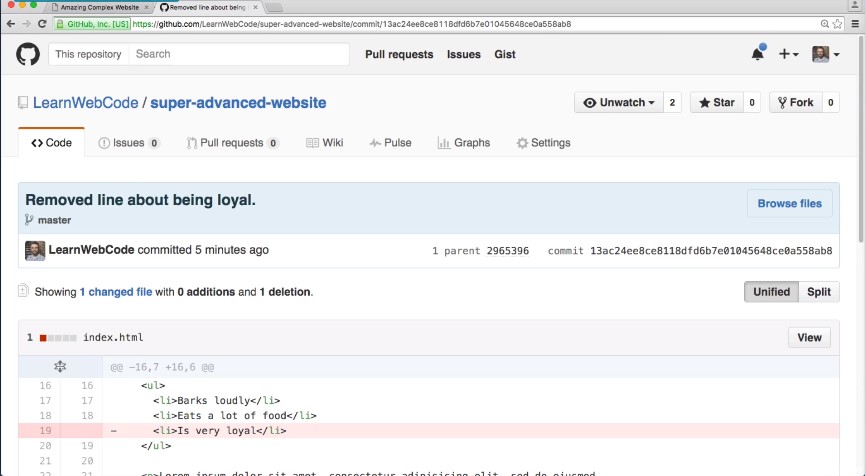
And that wraps up the basic get work flow that you would use on a daily basis.
Let’s review what we learned in this lesson we learned what a repository is. We learned that nothing gets saved into gets history until we commit.
And we learned that before we can commit we have to stage our changes or stage our files and we also learned that working with a server involves pushing and pulling.
So we learned quite a bit now in our next lesson you will begin to get your hands dirty. So I will help you install it on your computer and we will work on command line basics.
This is where things start to get fun and I will see you in the next lesson.

Hi, this is a comment.
To delete a comment, just log in, and view the posts’ comments, there you will have the option to edit or delete them.